Joystick on Amstrad range of 8 bit computers used almost the Atari standard.
Yet some modification occured, especially for the PLUS range as Amstrad aimed the console market (GX400) and used a politic of "Exclusive Hardware" like all console manufacturers of the time.
As a result is may be a problem to find proper Joysticks for your PLUS/GX4000.
The goal of this page is to find all proper solutions for modern Amstradist to play it for real and give some gameplay options to games designers who would like to introduce need element on CPC and PLUS games to come.
AMSTRAD CPC Joystick
Here are the Amstrad CPC Joystick port pinout
_________________
\ o1 o2 o3 o4 o5/
 \ o6 o7 o8 o9 /
  \___________/
| Pin No. | Signal Name | Description |
| 1 | Up | |
| 2 | Down | |
| 3 | Left | |
| 4 | Right | |
| 5 | Fire 3 | undocumented, used by the AMX Mouse for example |
| 6 | Fire 2 | |
| 7 | Fire 1 | Other systems pull +5V from here for auto-fire circuits! |
| 8 | GND | "Common" |
| 9 | GND2 | "Common 2" for 2nd joystick |
In this case, the numbering from the manual matches that of standard plugs. For a wiring diagram of an Y-cable with which you can use two joysticks on your Amstrad/Schneider CPC, see Joystick Y-cables.
Also most of the games didn't make use of the Fire2 button, and even more of the undocumented Fire3 button.
As Amstrad CPC do sport only one Joystick connection, it is possible to customise some kind of 6 button Joystock quite easily, using the 4 directions of the second button as additionnal fire, for use in 1 player games.
Such a custom device would need 2 controllers connectors to be used on an Amstrad plus.
Finding proper joysticks
It is not that easy, especially for the PLUS range.
Yet most traditionnal controllers working on Amiga 500 or Atari ST will work just fine on a good old CPC.
Few games made use of the possibility to have a second button, yet some controllers did feature this alongside Autofire.
One of the simpler way is to use SEGA joysticks and paddle, yet it may need some kind of adaptator (to be done here).
Sega Controllers
Source : http://pinouts.ru/Game/
- Sega Genesis (MegaDrive too?)
It' used a slightly different approach in joystick connection than Atari. The Sega joystick pinout seems to be the "standard" 2-button joystick configuration where pins 6 and 9 are used for buttons which ground the pin when pressed. The only strange thing is that the joystick seems to also want +5V at pin 5. Sega has added a 6-button model in addition to its original 3-button configuration. The 6-button joysticks use essentially the same interface, but add more buttons by using extra circuitry that multiplexes the new button signals with the existing joystick signals, using the control bit in connector pin 7. The chip inside the controller is a 74HC157. This is a high-speed CMOS quad 2-line to 1-line multiplexer. The console can, with help of the Select pin, choose from two functions on each input.
| Pin No. | Name (Select=GND) | Name (Select=+5V) |
| 1 | Up | Up |
| 2 | Down | Down |
| 3 | Gnd / Left | |
| 4 | Gnd / Right | |
| 5 | +5VDC | +5VDC |
| 6 | Button A | Button B |
| 7 | Select | Select |
| 8 | Ground | Ground |
| 9 | Start | Button C |
The genesis Paddle can be used almost unchanged on an Amstrad.
Directions work well.
Fire buttons A becomes Fire1 on Amstrad, and Select button becomes Fire 1 on Amstrad.
Also the 16bit SEGA paddle is a lot better than the poor Amstrad Pad, so a nice choice for every gamers, often quite easy to find.
- SEGA Master System
The SMS gamepads are almost exactly the same as normal Atari standard.
| Pin No. | Signal Name | Description |
| 1 | Up | |
| 2 | Down | |
| 3 | Left | |
| 4 | Right | |
| 5 | Power | |
| 6 | Button 1 | |
| 7 | N/C | |
| 8 | GND | |
| 9 | Button 2 |
Each button (left, right, button 1 ect.) is in fact a voltage(very small), this voltage is grounded to result in movement, fire, jump ect. For standard master system controllers this is directly feed to the system via wires only (some other controllers use a micro chip) they also are not connected to voltage, while some others do. The Sega Genesis (in Europe sold as Sega MegaDrive) pads are an extension to the Sega Master System pads. They use more buttons (3+1, 5+1, 6+1). They use the one usnused pin as a select pin for reading more buttons.
Those SMS standard controlers may be used alsmot unchanged on a CPC if the software allows to redefine controls. As a result you may use only one button : the fire 2 wich would be the button 1 on the controller.
It seems the "Power" button on SMS controlers is used when the controler is fitted with AutoFire option (needs to be checked) or when using the Lightgun.
Nunchakus technique
It is possible to achieve a pseudo Nintendo WII feeling by using 2 paddles, one for each hand.
If the game allows to redefine controls and the use of 2 joysticks, then you use :
- left hand as directional one, using an amstrad paddle turned 90° Clockwise.
Left = Up
Right = Down
Up = Right
down = left
(using your thumb)
- Right Hand as firing one, with a second paddle turned 90° Counterclockwise.
Access to fire 1 and 2 with the thumb.
By this mean, the cables don't mess with your hands... Also it is a nice way to deal with the shitty Amstrad Plus controllers size/quality. Yet this works only with 1 player games or need a custom connecting cable/box, a "reversed Y-cable".
You may also easily achieve a 4 fire button config by using both directional pads (one for each thumb yet the cable would be a nuisance) or a fixed Joystick (right hand, directions) + a paddle (left hand, fires).
PC controllers
Good old controllers for IBM PC & Compatibles weren't always USB, as it didn't really existed in the early 90s.
Many of them used a DA-15 connector, the same as the analog port on Amstrad Plus, wich was often pluged into the soundcard (Sound Blaster card was in fact game card...).
Those joystick weren't always analog too and many can still be found in your old cave awaiting a new life.
DA-15/DE-9 adaptators can also still be found.
More research concerning those's Pin-out schematics would be quite interesting.
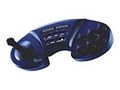
The Epic Awesomeness of the dreadfull PowerStation by Genius.

More pics to come.